Two important aspects of operating a DRSSTC Tesla coil for the first time is to first verify that the DC power supply providing power to the IGBTs is working properly as well as verifying that the DRSSTC is self-oscillating and operating with a dummy load installed in place of the secondary coil. It is very important to to verify both of these elements before attempting to tune and finally produce high voltage output with a secondary coil in place.
The video above shows a demonstration of testing the DC bus power supply as well as initial power-up and self-oscillation of a DRSSTC Tesla coil. The DRSSTC shown above is a Plasmasonic 1.3 Musical Tesla coil which is being tested for a customer. A Professional Handheld MIDI controller is being used as the interrupter for this test.
DC Bus Power Supply Verification
In this step, you will verify that the DC bus power supply is working correctly. Typically, the DC bus power supply in a DRSSTC is a rectified DC power supply using two large electrolytic capacitors in a voltage doubling configuration. In this configuration, your expected DC bus power supply voltage across the two electrolytic capacitors would be:
DC Bus Voltage = Input AC Line Voltage * 1.414 * 2
For 120VAC input this would be calculated to be:
DC Bus Voltage = 120VAC * 1.414 * 2 = 339.4 VDC
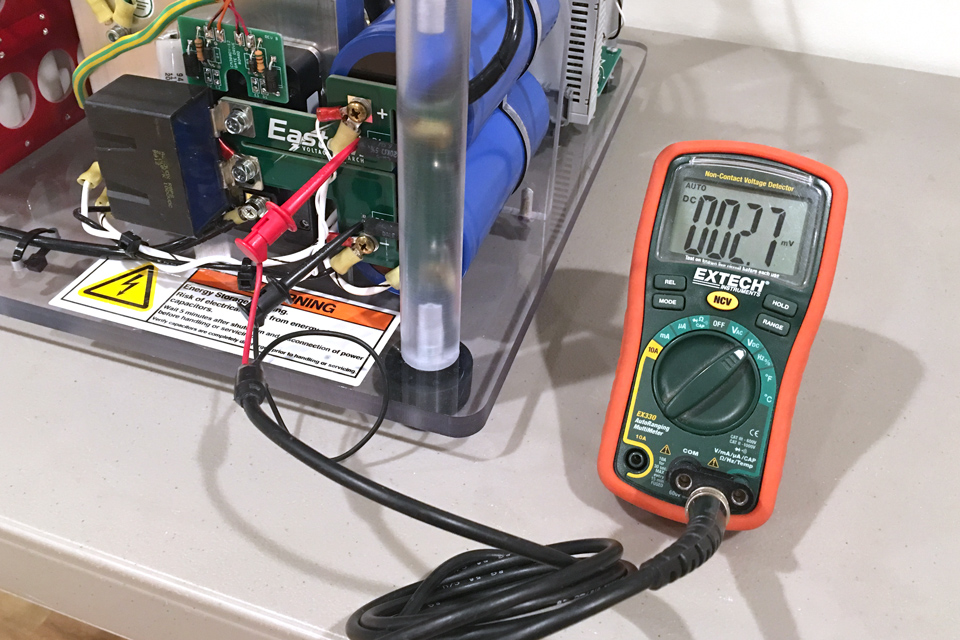
It is important to note you may not get the exact voltage as shown in this equation. For example, in the location where I am testing the DC bus power supply in the video above, my input AC line voltage is on the low side around 114VAC. This gives me a corresponding DC output voltage of approximately 322 VDC as shown in the video.
Multimeter connected across the DC bus capacitor stack
Use the following steps to verify your DC bus power supply:
- Put on your safety glasses.
- Verify that your gate drive circuitry and transformers are connected to the IGBTs. This is a very important step. The gate inputs to the IGBTs must be properly terminated to ensure that they are in an OFF state or they may fail spectacularly during this test. With a gate transformer in place, the secondary winding of the gate transformer that connects to the IGBT acts as a DC short and thus will short out the gate input to the emitter ensuring the IGBT stays off during this test.
- Connect a multimeter set to DC volts across your DC bus capacitor stack.
- For large DC capacitors, make sure you have the appropriate inrush limiting circuit in place or you may trip your home's AC line circuit breaker.
- Double check your connections one more time to make sure everything is correct. A simple wiring error can cause catastrophic damage to your Tesla coil.
- Apply AC line power and verify you get the approximate DC voltage as calculated in the equation above.
- If you do not get the correct DC voltage, then additional troubleshooting is required. Do not continue with the tests below until you have verifed the DC bus power supply is working.
Safety Bleed Resistor Test
In this step, you will verify that the safety bleed resistors across the DC bus capacitors are working properly. If you have an active crowbar circuit in place, you will also be checking that during this step.
Use the following steps to verify your safety bleed resistors are working properly:
- Put on your safety glasses.
- Repeat the DC bus power supply verification test above.
- Once the DC output voltage is verified, disconnect the AC power while watching the multimeter.
- Verify that the DC output voltage slowly discharges to 0 VDC.
- If you have an active crowbar circuit in place, verify this switches in and that the capacitors discharge very quickly. Typically with an active crowbar circuit, the discharge rate is designed so that the capacitors bleed to 30VDC or less within 5 seconds.
DRSSTC Dummy Load
A dummy load is used during initial power-up and tuning of a DRSSTC Tesla coil prior to having a secondary coil in place and creating high voltage output. The dummy load allows you to put a small resistive load on the primary circuit during the tuning process and also allows you to tune the DRSSTC Tesla coil without having to worry about a secondary coil producing high voltage arcs.

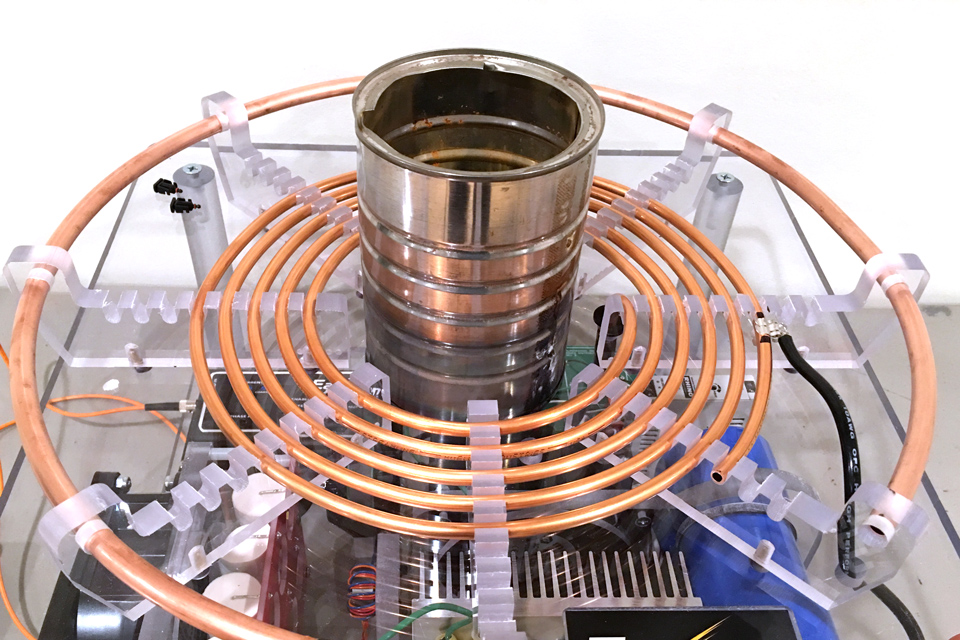
A steel coffee can makes an excellent dummy load for a low to medium power DRSSTC Tesla coil
For most small to medium DRSSTCs, a steel coffee can works extremely well, although due to its low thermal mass, it will get extremely hot very quickly, so it should only be used for a few seconds at a time. Also, be aware that if you have a plastic base, such as polycarbonate or acrylic, the dummy load can get hot enough to start melting the base and damage it. Filling the dummy load with water can increase the thermal mass, but since these cans are steel, it will cause them to rust pretty quickly.
Initial Power-Up and Self-Oscillation
Once the DC bus power supply is verified to be working properly, it is now time to check that the DRSSTC is self-oscillating and the controller is working properly. This test involves powering up the DC bus power supply, DRSSTC controller, and using an external interrupter to pulse the DRSSTC. If the DRSSTC is working properly with the proper dummy load in place, then you will hear the classic angry bee sound of the coil operating.

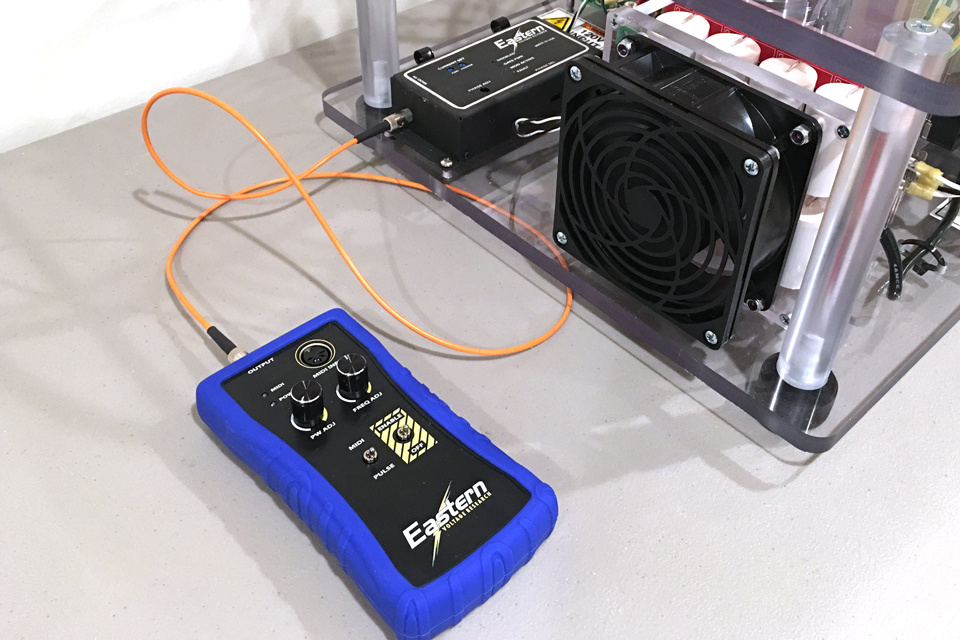
For this test, I am using one of our Professional Handheld MIDI Interrupters to pulse the Tesla coil.
To power-up your DRSSTC Tesla coil for the first time and to verify self-oscillation, please use the following steps:
- Put on your safety glasses.
- Connect the interrupter to the DRSSTC controller.
- Place an appropriate dummy load in the center of the primary coil. The secondary coil should not be installed at this time.
- Once again, double check all connections to make sure there are no wiring errors. A simple wiring error can spell disaster for components in your DRSSTC!
- Connect your multimeter set to DC volts across the DC bus capacitor stack.
- Apply the input AC power to the Tesla coil.
- Verify that the proper DC bus voltage is present.
- Turn on the interrupter and start slowly increasing the pulsewidth.
- If everything is correct, including phasing, you will hear the classic angry bee sound. If you do not hear the angry bee sound, then the Tesla coil is not self-oscillating. At this point, try reversing the phase. This can be done via the phase switch in the Universal DRSSTC controller, or by reversing the direction or connections of your 1000:1 feedback current transformer. Make sure to perform this step after AC power is disconnected and that you have verified that the DC bus capacitors have discharged to 0 volts!
- With the phasing reversed, repeat steps 6 through 8 above.
- If the Tesla coil is still not self-oscillating, then you will have a bit more troubleshooting to do.
Thank you for taking the time to read this article. If you have any further questions regarding this test, please feel free to contact us through our technical support page at any time.


